
Here you’ll find answers to the most frequently asked questions about our products.
Our interior mouldings
-
1. What material are the mouldings made of?
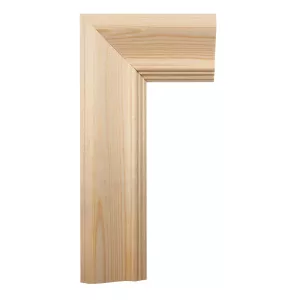
All our mouldings are made from solid Swedish pine. It’s a natural and dimensionally stable material, particularly well suited for interior use where both appearance and function matter.
The mouldings are generally knot-free on three sides, but smaller knots, grain irregularities and minor blemishes can occur as part of the wood’s natural character.
2. Are the mouldings treated or pre-painted?
No. Our mouldings are always sold untreated and unpainted. This gives you full freedom to choose colour, gloss level and finish. Untreated wood also ensures better adhesion for both primers and topcoats, which contributes to a more durable and aesthetically pleasing result.
Since the mouldings are untreated, they work equally well in both modern and traditional interiors. For a subtle look, paint them in the same colour as the walls – or go for a contrasting tone to highlight the woodwork.
3. What should I do about knots or surface cracks?
Small knots, chips and surface cracks are common in pine mouldings, even though they are carefully sorted and usually knot-free on three sides. To achieve a smooth and lasting finish, such imperfections should be treated before painting.
Start by filling the knots and cracks with a water- or oil-based wood filler, depending on the type of paint you plan to use. Let the filler dry completely according to instructions, then sand the surface smooth using fine sandpaper (grit 120–180). Be sure to remove all dust before continuing.
If you're painting the mouldings in light colours, it's especially important to block the knots properly. Otherwise, resin may eventually seep through the paint layers. Apply shellac (for example, a knotting solution) directly to the knots, or use a primer designed to block wood bleed. These methods can also be combined for extra protection.
4. Should I fill and sand before painting?
Yes, we recommend always filling and sanding the mouldings before painting. Even if they are already smooth, a light sanding will improve paint adhesion and reduce the risk of visible imperfections.
Fill any knots, blemishes, nail holes or dents with a suitable wood filler. For best results, use a fine filler that is easy to sand and doesn’t shrink too much during drying. Once dry, sand with fine sandpaper – we recommend grit 120 to 180 depending on the surface structure and type of paint you are using.
Wipe away all sanding dust with a microfiber cloth or vacuum to avoid particles getting stuck in the paint. If applying multiple coats, lightly sand between layers for a smoother finish.
5. Do I need to apply a primer before the topcoat?
Yes, priming is essential to ensure an even and durable finish. A primer acts as a sealer, binding the wood fibres and creating a uniform surface for the topcoat to adhere to. Without primer, the paint may absorb unevenly and appear patchy – especially on untreated wood.
If the mouldings contain knots, which is common in pine, choose a primer with sealing properties or combine it with a shellac treatment before priming. This reduces the risk of staining, which may otherwise cause yellow or brown marks to bleed through – even after several coats.
Use a primer formulated for interior woodwork that is compatible with your chosen topcoat. Apply with a brush and allow it to dry thoroughly. A light sanding after priming can also help achieve an ultra-smooth base for the final layer.
6. Should I use shellac or stain-blocking primer for knots?
Yes, if you're painting in light colours, it's always a good idea to treat the knots to prevent bleed-through. Pine contains natural resins (pitch) that can seep through the paint over time, especially with temperature changes.
There are two common ways to block this:
- Shellac is applied directly to the knots with a brush. It dries quickly, has a strong smell, but provides very effective sealing against resin bleed.
- Stain-blocking primer is a type of sealing primer that can be applied over the entire surface. It is often used on its own but can also be combined with shellac for extra protection.
When painting in dark colours, visible bleed-through is less likely – but priming is still recommended to create an even surface.
7. What kind of paint is recommended for the mouldings?
The type of paint depends on the room’s purpose, desired finish, and the level of wear the mouldings will be exposed to. For interior mouldings, the following types are commonly used:
- Water-based trim paint is easy to apply, has low odour and dries quickly. Suitable for skirting boards, architraves, cornices and decorative mouldings in dry indoor spaces.
- Oil-based trim paint provides a harder surface and has a longer open time, allowing for a smoother finish. It’s more durable and well-suited for hallways, kitchens and staircases.
Regardless of the type you choose, always start with a suitable primer to ensure good adhesion. Consider also the gloss level – matt paints hide imperfections, while semi-gloss and gloss finishes create a more defined look.
8. How should I mount the mouldings – nails, glue or something else?
Mouldings can be installed in different ways depending on their size, placement and the wall material. The most common methods include:
- Finishing nails or brads are often used for architraves, skirting boards and cornices. Pre-drill near end grain to avoid splitting. Use a nail gun or hammer with care.
- Construction adhesive is ideal for smaller and lighter mouldings, especially when nailing into fragile walls is not desirable. Ensure surfaces are clean and dry for best adhesion.
- Combination of glue and nails gives both strength and easy installation – especially helpful on uneven surfaces.
Mount the mouldings at room temperature and allow them to acclimate in the room for at least a day before installation. This helps prevent movement after mounting.
9. Are the mouldings delivered in fixed lengths?
No. Our mouldings are delivered in random lengths, meaning each order is picked from what’s available in stock at the time. Typical lengths range from 2.3 to 4.5 metres for architraves, and from 2 metres upwards for other types. Specific measurements cannot be selected in advance.
We do not cut mouldings to fixed lengths when ordering. This allows you to trim them to suit your room and avoid unnecessary joints or mismatched cuts.
10. How much waste should I account for when ordering?
We recommend ordering 15–20% extra material beyond your measured need. This provides margin for offcuts, joints and possible mistakes during installation.
In older buildings, walls and angles may be irregular, requiring more cuts and adjustments. Having a bit of extra stock also allows you to choose the most suitable lengths for visible areas.
Keeping spare pieces on hand helps avoid placing a second order just for a metre or two – saving both time and shipping cost.
11. Can I order samples?
Yes, you can order samples of many of our moulding profiles directly from our webshop. A sample is a great way to see the profile, feel the grain, and test how it works in your space – both practically and visually.
All samples are cut to a manageable length (usually 15–20 cm) and delivered untreated, just like the full-sized mouldings. This means you can test-paint them, hold them against the wall or temporarily mount them to evaluate proportions and style.
Keep in mind that wood is a natural material – small variations in grain and tone are normal, even between pieces of the same profile. Still, a sample gives a clear idea of the shape, depth, edge profile and overall character.
12. How do I fix nail marks or hammer dents?
If you get small dents or indentations in the wood during handling or installation, the fibres can often be raised again using moisture and heat. This is a well-known trick in woodworking, especially effective on softwoods like pine.
Here's how to do it:
- Lightly dampen the dent with water – using a sponge or small brush.
- Place a damp cotton cloth (like a wrung-out tea towel) over the dent.
- Press gently with a warm iron onto the cloth for a few seconds.
The steam will cause the wood fibres to swell and rise, helping to level the surface. After drying, sand the area lightly with fine sandpaper before painting.
Note: This method works best on fresh, untreated wood. On painted or varnished surfaces, results may vary and the finish could be affected.
Skirting Boards & Floor Mouldings
-
1. What height of skirting board should I choose for each room?
The height of your skirting boards affects both the proportions and the overall style of a room. In older homes with high ceilings, boards of 10–15 cm or more are often used to create a strong base and emphasize the room’s architecture. In modern interiors, shorter boards – typically 6 to 9 cm – are more common and offer a subtler look.
A general rule: the higher the ceiling, the taller the skirting. In small rooms, overly high skirting can feel dominant, while very low skirting in larger spaces may seem unfinished. Also consider your furniture – taller skirting boards will remain visible behind bookshelves and cabinets, which affects the visual balance.
2. What's the difference between skirting board, baseboard, timber skirting and floor trim?
These terms are often used interchangeably, and they all refer to mouldings placed along the base of a wall where it meets the floor. At Gaveldekor, we mainly use the term skirting boards, but you may also come across baseboards, timber skirting or floor trim.
Technically, “baseboard” can sometimes refer to a more solid structure (such as in kitchens or entryways), while “trim” may imply a lighter moulding. In practice, the difference is mostly linguistic. The most important thing is to choose a profile and height that suits the style of the room and the flooring.
3. How do I make a neat transition at door frames?
For a clean result where the skirting meets door frames or thresholds, measure carefully and cut the skirting so it aligns flush with the architrave. For outside corners, use a mitre saw at 45–47 degrees to create a unified corner. For inside corners, you can choose either a mitre joint or a straight cut, depending on whether the joint will be painted or left visible as natural timber.
If the wall is uneven, adjust the joint with decorators caulk or sand the end slightly to close any visible gaps. Always test-fit the skirting dry before fixing – this helps you spot and correct misalignments for a more professional finish.
4. Should the skirting sit flush with the floor or leave a gap?
In general, skirting boards should sit flush against the floor to cover any gap between wall and flooring, and to give a tight, finished look. However, small variations may be needed depending on the levelness of the floor.
If the floor slopes or has uneven spots, you may need to leave a slight gap and fill it with decorators caulk after installation. In older homes with moving wooden floors, a small gap can also help prevent the skirting from warping or cracking due to movement. Adapt your installation to suit the specific conditions in your room.
5. How do I create neat, discreet joints between skirting boards?
To create an almost invisible joint, we recommend cutting the ends at an angle – known as a mitre joint – so they meet at a 45-degree angle. This creates a smoother transition than a straight cut and helps the boards stay aligned even if the wood shifts slightly over time.
Apply a thin layer of wood glue at the joint before fixing, especially if you plan to paint the boards. Fill the joint with filler, sand it smooth and then paint for a seamless finish. If your skirting has a strong profile, try to place joints in less visible parts of the room – like behind furniture or in corners.
6. Can I paint the skirting the same colour as the wall?
Yes, this is a common and stylish option. Painting the skirting in the same colour as the wall creates a unified look and makes the room feel calmer and more cohesive. It’s especially effective in modern interiors or in spaces where you want a clean and understated aesthetic.
Alternatively, painting the skirting in a contrasting colour – such as white against a coloured wall – defines the boundary of the room and highlights the shape of the trim. This is a traditional choice in period homes. Either way, make sure to use a primer and choose a durable paint that withstands everyday wear and cleaning.
7. How do I prevent the skirting from splitting when nailing?
Splitting usually occurs when nails are driven near the end grain or when nails are too thick. To reduce the risk:
- Pre-drill near the ends, especially for narrower boards.
- Use brads or finishing nails of the right size – not too thick or too long.
- Drive nails in at a slight angle or “cross-nail” for extra stability.
- Use a nail punch to set the nails below the surface without damaging the timber.
Alternatively, a nail gun provides more consistent force and reduces the risk of splitting. For delicate cases, you can also use construction adhesive in combination with hidden fixings.
8. What's the best way to install skirting on concrete walls?
Installing skirting on concrete often requires different methods than with stud walls. Here are two common approaches:
- Screws and plugs: Drill through the skirting and into the wall, insert plastic plugs and fasten with screws. This is strong and secure but requires careful planning and placement.
- Construction adhesive: Apply adhesive to the back of the board and press it to the wall. Temporarily brace or tape the board until the glue sets. This method is easier and creates a hidden fixing but works best on clean, flat surfaces.
In some cases, a combination of glue and a few screws or nails helps secure the fit while the adhesive cures. Be sure the surface is clean and dry for best adhesion.
9. Can I combine tall skirting boards with modern flooring?
Absolutely. Tall skirting boards create a beautiful contrast against the clean lines and plain surfaces of many modern floors. The result is a blend of old and new – a style popular in period renovations and new builds alike.
The key is balance. In rooms with low ceilings or small dimensions, tall skirting may overpower the space. But in rooms with standard or tall ceilings, they can add architectural weight and character. For best effect, consider pairing them with other traditional trim features for a cohesive look.
10. How does the height and profile of skirting boards affect the room's character?
Skirting boards do more than cover the gap between floor and wall – they also set the tone for the entire room. A tall skirting board brings a sense of weight and permanence, ideal for older homes or high-ceilinged spaces. A short, minimal skirting makes the walls feel taller and suits smaller rooms or contemporary interiors.
The profile matters too. A classic shape with a bevel or bead creates a traditional look, while flat or square-edged boards suit modern, minimalist spaces. Painting the skirting the same colour as the wall softens its impact, while contrasting colours make it stand out as a decorative detail.
Door & Window Architraves
-
1. How do I get clean and tight mitre joints?
Achieving tight and clean mitres on door and window architraves requires precise cutting and dry fitting before installation. Use a mitre saw or a combination saw with a stable fence to cut the mouldings at a 45-degree angle. It's important that the saw is well calibrated and that the cut surfaces are clean and smooth to ensure a tight joint.
Dry-fit the pieces on the wall before nailing them in place, so you can check that the corners meet without gaps. If the wall corner isn’t a perfect 90 degrees, you may need to adjust the mitres slightly to get a snug fit. Only fasten the mouldings when you’re satisfied with the alignment, and apply decorators caulk in the joint to create a seamless look after painting.
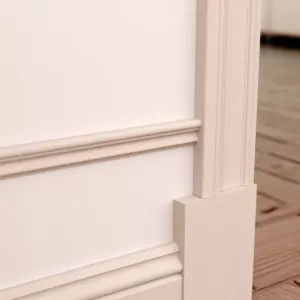
2. What’s the difference between door architraves and window architraves?
Door and window architraves are essentially the same type of moulding – they’re used to frame an opening and cover the gap between wall and frame. The difference lies in placement: door architraves go around doors, while window architraves surround windows. Depending on window depth and position, you may need to adjust the moulding width for a proper finish.
The style and profile are often the same, especially if you want a consistent look throughout the house. In older homes, slightly narrower architraves are sometimes used around windows, particularly where the reveals are shallow. But this is not a rule – choose what fits your interior best.
3. Can I use the same architrave for doors and windows?
Yes, absolutely. Many people choose the same profile for both doors and windows to create a cohesive look across the room or the entire house. It creates harmony and makes the woodwork feel consistent, especially in open-plan areas where doors and windows are visible at the same time.
If the window reveal is deep or the wall surface is uneven, you may need to adapt the installation with spacers or extensions. But in general, our architrave profiles work just as well around windows as around doors.
4. What width of architrave should I choose?
The ideal width depends on the room’s proportions, overall style and the size of the door or window frame. In traditional homes, wide architraves – between 7 and 12 cm – are common for creating a strong visual base and emphasising architectural features. In more modern homes, slimmer mouldings (around 7–10 cm) are often used for a simpler, more understated effect.
Wider mouldings tend to suit areas with plenty of space around the frame, while narrow architraves work better in tight hallways. Make sure to coordinate with skirtings and cornices in both style and width for a well-balanced overall look.
5. Should I paint the mouldings before or after installation?
We recommend priming the mouldings before installation. That way, you can easily reach all surfaces, especially edges that will sit flush against the wall or frame. Priming also protects the wood from moisture and improves paint adhesion.
Apply the topcoat after the mouldings are fixed in place and nailed. This allows you to fill nail holes, apply caulk and sand joints before finishing the final coat. The result will be a smooth, even surface without shadows or imperfections.
6. How do architraves affect the room’s style and overall impression?
Architraves around doors and windows play a bigger role in a room’s style than many people think. They frame the openings and act as a transition between wall and woodwork. A wide, profiled architrave adds a traditional or period feel, while a narrow and plain moulding creates a modern, minimalist impression.
By selecting the right profile, you can either make the architraves blend in – especially if painted the same colour as the wall – or stand out as a design feature. In historic homes, they help preserve character, while in newer houses they add shape and definition to the space.
7. Do I need caulk between the architrave and wall?
It’s not essential, but decorators caulk often gives a cleaner and more seamless result. A thin bead of caulk between moulding and wall helps to hide small gaps and irregularities – especially if the wall isn’t perfectly straight. It also creates a smoother transition between materials.
Use high-quality caulk and apply a thin, even line along the outer edge of the moulding. Smooth it with a damp finger or caulking tool before it dries. Once painted over, the caulk becomes nearly invisible and makes the join appear seamless.
8. Can I use corner blocks and plinth blocks with architraves?
Yes, corner blocks are a traditional and practical addition to architraves. They’re installed at the junction between the architrave and skirting board and create a clean, defined stop. They also enhance a classical or early 20th-century look, especially in period homes.
Corner blocks simplify installation too – particularly when walls or angles are irregular. They pair especially well with wide skirtings and architraves, but slimmer versions are also available for more modern settings.
9. How do I make neat joints on long mouldings?
When joining long lengths of architrave – for example around large windows or double doors – it’s best to use a scarf joint, meaning a diagonal cut. This makes the joint less visible and allows the pieces to follow the wood grain more naturally.
Cut the ends at opposite angles (e.g. 30–45 degrees), glue the joint and fix the moulding in place. Once the glue is dry, fill, sand and paint the joint to make it almost disappear. Avoid placing the joint in corners or at eye level – choose a less visible spot where possible.
10. What’s the best way to keep equal spacing from the door frame?
To maintain consistent spacing between architrave and door frame, use spacers – such as small blocks of cardboard, plastic or timber – during installation. Place the spacer between frame and moulding to ensure a uniform gap along the entire edge. A common measurement is 5 mm, but it depends on the frame width and visual preference.
Double-check the spacing with a ruler or tape measure before nailing. In older homes, frames may be uneven – so measure in several spots. By adjusting with spacers and checking as you go, you’ll achieve a symmetrical and professional-looking result.
Taklister
-
1. Vad är skillnaden mellan taklist och hålkälslist?
En taklist monteras mellan vägg och tak och fungerar både som avslut och dekoration. Den bygger ofta ut från väggen i en vinkel, vilket gör att den syns tydligt och ramar in rummet uppifrån. En hålkälslist, däremot, har en rundad eller konkav form och sitter mer inskjuten i hörnet. Den smälter in på ett annat sätt och ger en mjuk övergång mellan vägg och tak.
Båda typerna har samma praktiska funktion – att dölja övergången – men de ger olika visuella uttryck. Taklister passar särskilt bra i rum där man vill ha ett mer markerat och traditionellt avslut, medan hålkälslister används för att skapa ett diskretare eller äldre hantverksmässigt intryck.
2. Hur monteras taklister i sneda eller ojämna hörn?
Vid sneda eller ojämna hörn är det viktigt att först kontrollera vinkeln innan du kapar listerna. Använd ett vinkelmått eller mall för att ta reda på exakt hörnvinkel. Om vinkeln inte är exakt 90 grader – vilket är vanligt i äldre hus – behöver du justera kapningen därefter, ofta genom att dela vinkeln mellan de två listerna.
Använd en geringssåg med ställbar vinkel eller kap- och gersåg för att få ett exakt snitt. Torrpassa alltid listerna innan du monterar dem, så att du kan justera och få täta fogar. För att dölja mindre springor kan du använda målarfog efter montering.
3. Passar era taklister i moderna hem?
Ja, flera av våra taklister passar utmärkt även i moderna hem. Det handlar främst om att välja en profil som är lågmäld och inte för bred. En smal, slät taklist kan ge ett sobert och diskret avslut utan att kännas överdekorerad, särskilt om den målas i samma färg som väggen eller taket.
Taklister kan också fungera som ett sätt att mjuka upp övergången mellan vägg och tak i rum där man annars har mycket raka linjer och hårda kontraster. Det skapar en mer omsorgsfull känsla, även i minimalistiska miljöer.
4. Hur undviker jag springor mot tak eller vägg?
Springor uppstår oftast om tak eller väggar inte är helt raka, vilket är vanligt särskilt i äldre hus. För att minimera glipor är det viktigt att torrpassa listerna före montering och anpassa kapningen efter rummets verkliga vinklar.
Efter att listerna monterats kan du täta mindre springor med målarfog längs kanterna. Det gör både övergången tätare och ger ett mer professionellt utseende efter målning. Använd gärna ett fogverktyg för att få en jämn och smal foglinje.
5. Ska taklisten sitta dikt mot vägg och tak?
Ja, taklisten bör monteras så att den ligger dikt mot både vägg och tak. Det ger bäst passform, minskar risken för skuggor och gör att listen sitter stabilt. Om underlaget är ojämnt kan det bli nödvändigt att justera något med slipning eller fylla ut med målarfog i efterhand.
Om du använder lim som istället för spik är det särskilt viktigt att listerna ligger an ordentligt, eftersom ojämnheter annars kan påverka fästet. Vid spikmontering kan du trycka till listen så att den formas efter väggen, särskilt om träet är lite flexibelt.
6. Kan jag använda listlim istället för spik?
Ja, många taklister kan monteras med konstruktionslim eller listlim. Det är särskilt praktiskt om du vill ha dold infästning utan spikhål. Lim passar bäst på jämna underlag där listen får god kontakt med både vägg och tak.
För tyngre profiler eller om underlaget är ojämnt rekommenderar vi att du kombinerar lim med några spik eller små skruv för att hålla listen på plats medan limmet härdar. Använd tejp eller tillfälliga stöd om det behövs. Läs alltid på limtillverkarens anvisningar om torktid och applicering.
7. Hur bred bör en taklist vara i ett rum med normal takhöjd?
I rum med normal takhöjd (cirka 2,4 meter) fungerar taklister som är mellan 4 och 7 cm breda oftast bäst. De ger en tydlig avslutning utan att ta över rummet. Om takhöjden är lägre än normalt kan det vara klokt att välja en något smalare list för att rummet inte ska kännas trängre.
Vid högre takhöjd – till exempel 2,7 meter eller mer – kan bredare taklister användas för att skapa en mer markerad övergång. Välj en profil som harmonierar med rummets övriga snickerier, så som foder och socklar.
8. Ska man måla taklisten i väggens eller takets färg?
Det beror på vilken effekt du vill uppnå. Om du målar listen i samma färg som väggen smälter den in och skapar ett lugnt och sammanhållet uttryck. Om du istället målar den i takets färg – ofta vitt – får du en tydlig avgränsning och listen framträder mer.
I klassiska miljöer är det vanligt att taklisten målas vit, oavsett väggfärg. I moderna miljöer kan det vara effektfullt att låta listen gå ton i ton med väggen. Oavsett val är det viktigt att använda en färg som lämpar sig för snickerier och ger ett slätt resultat.
9. Vilken listprofil passar bäst till sekelskiftesstil?
För att förstärka en sekelskiftesstil rekommenderar vi profilerade taklister med mjuka böljande former eller flera steg i profilen. Klassiska hålkälslister och breda taklister med välformad kant passar särskilt bra i rum med högre takhöjd och äldre fönster- eller dörrsnickerier.
Kombinera gärna taklisten med breda dörrfoder och socklar för att skapa ett enhetligt uttryck. Måla listerna vita eller brutet vita för att efterlikna äldre interiörer – det ger en tidstypisk känsla som fungerar i allt från lägenheter i stenstad till renoverade villor.
10. Hur påverkar taklister rummets proportioner och stil?
Taklisten spelar en viktig roll i hur ett rum upplevs. Den ramar in ytan uppifrån och kan både förstärka rummets höjd och ge balans mellan vägg och tak. En smal taklist kan få väggen att kännas högre, medan en bred list ger ett mer gediget och avslutat intryck.
Stilen påverkas också av profilens form. En enkel, rak list ger ett modernt och diskret uttryck, medan en profilerad list bidrar med karaktär och detaljrikedom. I rum med högt i tak kan taklisten användas för att visuellt "sänka" taket något och skapa mer ombonad känsla, särskilt i kombination med ljus färgsättning.
Chair rails
-
1. What are decorative mouldings used for?
Decorative mouldings are used to give walls and interior elements a more refined and traditional appearance. They can be used to create wall frames, outline sections, enhance panels, or mark transitions between surfaces. While common in period-style interiors, they also suit new builds where added character is desired.
Mouldings can also be applied to furniture, doors, wardrobes, or panelled doors to reinforce a classic look. Many choose to combine decorative mouldings with skirtings and architraves to create a consistent style throughout a room.
2. How do you create wall frames with moulding?
To create wall frames using decorative mouldings, begin by measuring and marking the layout on the wall. Use pencil lines or masking tape to define each frame. Leave even spacing between mouldings and adjacent surfaces for a balanced result.
Cut the mouldings at 45-degree angles for clean corner joints. Fix them directly to the wall using construction adhesive or mounting glue. Once dry, fill and sand the joints if needed, then paint everything in the same colour as the wall – or in a contrasting tone to highlight the frames.
3. Can mouldings be installed directly on wallpaper?
Yes, mouldings can be installed directly on wallpaper, provided the wallpaper is firmly attached and has a smooth surface. Make sure the surface is clean and dust-free before applying glue. Use a fast-setting mounting adhesive and press the moulding firmly into place.
In some cases, lightly roughening the wallpaper or marking the position with a pencil can help. If the wallpaper is fragile, consider removing a strip where the moulding will go and mount directly to the underlying wall surface.
4. Do decorative mouldings suit modern interiors?
Yes, decorative mouldings can be used in modern interiors. It depends on the profile and how they are combined. A simple, understated moulding can add a sense of craftsmanship without disrupting a modern aesthetic. When painted the same colour as the wall, the result is subtle yet characterful.
In minimalist spaces, mouldings can be used to create frames or panels that bring interest to large wall areas. Combining classic joinery with contemporary furnishings is increasingly popular in modern homes and renovated apartments.
5. How do you finish corners and ends neatly?
For neat corners, mitre joints are commonly used – cutting the mouldings at 45 degrees so they meet at a point. This gives a seamless and professional look. Use a mitre box or compound mitre saw for best results.
Where a moulding ends without meeting a corner – for example, next to a door or mid-wall – it can be cut at an angle or finished with a small end block or flat cut. The key is to make the end look intentional and well-integrated.
6. Which moulding profile works best for wall panelling?
For wall panelling, a narrow, profiled moulding with soft curves or chamfered edges works well. It should clearly define the frame without dominating the wall. Rounded contours and subtle profiles often enhance a more traditional expression.
7. Should mouldings be painted before or after installation?
We recommend painting mouldings after installation, especially if using the same colour as the wall. This allows you to fill, sand, and paint the entire surface for a seamless finish. However, it’s a good idea to prime the mouldings beforehand – particularly if using a stain-blocking primer or shellac to seal any knots.
If you prefer painting before installation, plan for touch-ups after fitting – especially at joints, corners, and nail holes.
8. How do you join mouldings neatly?
To create a discreet joint, cut the mouldings at an angle – around 30–45 degrees – so the seam is slanted. This makes it less visible and easier to fill and sand smooth. Apply wood glue and press the pieces firmly together when fitting.
Light sanding and painting the entire section afterwards helps ensure a smooth appearance. This is particularly important if the mouldings are installed at eye level or on a wall with reflective light.
9. How long are the decorative mouldings?
Our decorative mouldings are supplied in random lengths, typically between 2.0 and 4.5 metres, depending on current stock. Specific lengths cannot be selected at checkout.
If your project involves large frames or long runs, we recommend ordering 15–20% extra to allow for joints and waste.
10. Can I order mouldings in specific lengths?
No, we do not offer mouldings in fixed or custom lengths. They are supplied in the lengths available in stock at the time of ordering. If your project involves many short pieces, offcuts from longer lengths can often be used efficiently.
We suggest including a margin when ordering to allow for adjustments and consistent results.
11. Are the mouldings knot-free?
Our mouldings are generally knot-free on three sides, but minor knots or imperfections may occur. For a smooth and lasting result, fill any irregularities and use painter’s caulk at corners and edges as needed.
If visible knots are present, it's best to prime with a stain-blocking primer or shellac to prevent resin from seeping through. Your paint supplier can advise on suitable products for your project.
12. Can I order samples of the mouldings?
Yes, we offer samples of most of our decorative mouldings. A sample is a short section of the moulding profile, making it easier to assess shape and style. Many customers order samples before choosing the right profile for their home.
You’ll find samples listed under each product or on the “Samples & Test Pieces” page. Feel free to contact us if you’re looking for a specific profile.
Skurklossar och fodersocklar
-
1. Vad är syftet med skurklossar och foderklossar?
Skurklossar och foderklossar används som avslut vid listernas ändar, till exempel där dörrfoder möter golvsockel. De förenklar monteringen genom att du slipper snedkapa listerna i hörn – istället kan de kapas rakt och läggas an mot klossarna. Det ger både ett prydligt avslut och en mer traditionell känsla i inredningen.
Skurklossar heter också "skurgnagge" och sockelkloss.
Namnet "skurkloss" har sin bakgrund i äldre svensk byggtradition, där golven ofta skurades med mycket vatten. Då var det praktiskt att ha en separat kloss längst ner som kunde bytas ut om den tog skada av fukt, utan att behöva ersätta hela fodret.
2. När använder man skurklossar?
De sparar tid vid monteringen, ger symmetri och förenklar justeringar. Dessutom skapas ett distinkt möte mellan sockel och foder, vilket ger ett genomarbetat intryck även i enkla miljöer.
3. Ska klossarna vara bredare än fodret?
Ja, det är vanligt att skurklossar och foderklossar är några millimeter bredare än fodret. Det skapar en tydlig kontur och markerar klossen som en egen snickeridetalj. Det är också praktiskt eftersom det blir lättare att passa in fodret mot klossen utan synliga glipor.
Hur mycket bredare klossen bör vara är en smaksak – ofta räcker det med 5–10 mm bredare än fodret för att skapa rätt proportion.
4. Hur hög bör en skurkloss vara?
Höjden på en skurkloss kan variera, men en vanlig tumregel är att den ska vara något högre än golvsockeln, så att klossen sticker upp en bit och skapar en markerad avslutning. En höjd på cirka 90–160 mm fungerar i de flesta miljöer.
För att få rätt proportion till dörrfoder och takhöjd kan det vara bra att provplacera några klossar innan du monterar. Det viktigaste är att höjden harmonierar med rummets övriga snickerier och ger en balanserad övergång mellan golv och foder.
5. Hur fästs klossarna – spik eller lim?
Klossarna kan fästas med antingen spik eller lim – eller en kombination av båda. I regel används dyckertspik eller små trådspik för att säkra klossen, särskilt om väggen är ojämn. Spiken kan slås in snett från sidan eller genom klossens front, och döljs sedan med spackel före målning.
Om underlaget är jämnt fungerar konstruktionslim eller montagelim utmärkt. Det ger en dold infästning och gör att du slipper spikhål. Vid limning kan du fixera klossen med maskeringstejp tills limmet härdat.
6. Passar era klossar till alla foderbredder?
Våra klossar finns i flera olika bredder för att passa olika typer av dörrfoder. Tanken är att du ska kunna välja en kloss som är något bredare än fodret du använder – det ger ett harmoniskt avslut och förenklar monteringen.
Om du är osäker på vilken storlek som passar bäst till dina foder, är du alltid välkommen att kontakta oss för råd. Det går också bra att beställa provbitar för att testa i ditt hem innan du gör din beställning.
7. Hur målar man klossar tillsammans med foder?
Klossar och foder målas ofta i samma färg för att ge ett enhetligt intryck. Du kan välja att grundmåla alla delar innan montering och sedan färdigstryka dem på plats – eller att måla allt efter att listerna och klossarna är monterade.
För bästa resultat rekommenderar vi att du spacklar och slipar alla fogar, använder målarfog längs kanter och väljer en färgtyp avsedd för snickerier. Det ger en slät och hållbar yta som ser professionell ut även vid närmare granskning.
8. Går det att använda klossar i moderna hus?
Ja, skurklossar kan även användas i moderna hus – men det gäller att välja rätt modell. En rak och enkel kloss utan profiler eller frästa kanter passar ofta bäst i moderna miljöer. Då fungerar klossen mer som en diskret övergång än som en dekoration.
9. Kan jag kombinera klossar med golvsockel och dörrfoder?
Ja, det är precis det som är syftet med skurklossar – de används för att binda samman golvsockel och dörrfoder på ett harmoniskt sätt. Klossen placeras i hörnet mellan sockel och foder och ger ett naturligt möte mellan listerna.
Det ger också ett mer gediget uttryck och lyfter helheten i rummet. Genom att välja klossar i rätt bredd och höjd kan du skapa balans mellan de olika listerna och få ett professionellt resultat även som hemmafixare.
10. Är klossarna massiva eller ihåliga?
Våra skurklossar och foderklossar är massiva och tillverkade i obehandlad svensk furu. De är alltså inte gjutna eller ihåliga, utan har samma materialkvalitet som våra övriga lister. Det gör dem lätta att bearbeta, limma och måla, samtidigt som de känns gedigna.
Eftersom de är massiva kan de också kapas, slipas eller anpassas vid behov – exempelvis om du vill göra en fasning, en urtagning för kabel eller justera höjden något.
Träkonsoler & Snickarglädje
-
Hur fäster jag träkonsolerna på fasaden eller under taket?
Våra träkonsoler fästs enklast med konstruktionslim eller monteringslim direkt mot underlaget. Se till att ytan är ren och torr innan montering. För extra stabilitet kan du även förborra och skruva fast konsolen. Tänk på att konsolerna främst är avsedda som dekoration, så bärande infästning krävs bara i undantagsfall.
Kan konsolerna bära vikt, eller är de bara dekorativa?
Våra konsoler är tillverkade i antingen björk eller furu och har god hållfasthet, men de är inte dimensionerade för att bära vikt. De används som dekorativa trädetaljer vid farstukvist, entré eller altan.
Vilket träslag används i era konsoler?
Konsolerna tillverkas i björkplywood eller furu (massivt trä). Det är ett formstabilt och lättbearbetat material som lämpar sig väl för utomhusmiljö – särskilt om det grundas och målas noggrant.
Är konsolerna grundmålade eller levereras de obehandlade?
Alla våra konsoler levereras obehandlade. Det innebär att du själv kan välja ytbehandling utifrån fasadens färg och stil. För bästa hållbarhet rekommenderas impregnering eller grundning före målning, särskilt om konsolen ska sitta utsatt för väder.
Vilken konsolstorlek ska jag välja till farstukvisten?
Det beror oftast på storleken och höjden av farstukvisten. Mät gärna på plats och välj en modell som harmonierar med husets proportioner. Är du tveksam så kontakta oss, så hjälper vi dig.
Passar era konsoler till både nya och äldre hus?
Ja, våra konsoler passar utmärkt både vid nybyggnation och renovering av äldre hus. Flera modeller är inspirerade av traditionell svensk byggstil och ger ett tidstypiskt uttryck till farstukvist och veranda. Samtidigt fungerar de även som en stilmarkör i mer modern arkitektur.
Hur lång är leveranstiden för träkonsoler?
Konsolerna tillverkas på beställning och skickas normalt inom 7–10 arbetsdagar. Aktuell information om leveranstider hittar du alltid under leveransinformation. Tänk på att viss fördröjning kan förekomma under högsäsong.
Våra träräcke och räckesribbor
-
Vilket material är räckesribborna tillverkade av?
Räckesribbor i BJÖRK
Våra räckesribbor i björk tillverkas av WBP-limmad björkplywood, vilket är ett konstruerat trämaterial uppbyggt av tunna björkfanér i korslagda skikt. Standardtjockleken är 18 mm, men vi kan även tillverka i 24 mm för dig som önskar ett rejälare uttryck.
Limningen är av typen WBP – Water and Boil Proof – vilket innebär att skivan klarar både fukt, regn och stora temperaturväxlingar, förutsatt att den ytbehandlas och underhålls. Det är samma typ av lim som används inom marin tillverkning. Björkplywood är dessutom mycket formstabil, vilket gör det möjligt att skapa smalare och mer detaljerade profiler än vad som vore möjligt i massivträ.
Räckesribbor i FURU
Våra räckesribbor i furu tillverkas av stavlimmad massiv furu, ett naturligt trämaterial sammansatt av noggrant utvalda furustavar som limmats kant i kant. På så vis minimeras risken för sprickbildning och vridning, samtidigt som varje ribba får en stabil konstruktion med ett genuint utseende.
Standardtjockleken är 21 mm, vilket är en traditionell dimension med god hållfasthet. Materialet levereras obehandlat och är avsett att ytbehandlas med linoljefärg, oljebaserad utomhusfärg eller vattenbaserade alternativ beroende på önskad kulör och uttryck.
Den stavlimmade konstruktionen gör det möjligt att kombinera den massiva känslan av trä med bättre formstabilitet än vad helsågade brädor ofta ger. Eftersom profilerna är frästa ur massiv furu, passar det särskilt väl för dig som restaurerar äldre byggnader eller eftersträvar ett mer traditionellt hantverk.
Alla delar fräses av oss i Sverige!
Kan jag få räcket målat eller grundat?
Nej, våra räckesdelar säljs alltid obehandlade och omålade. Det ger dig som kund full frihet att själv välja färgsystem, kulör och typ av ytbehandling – anpassat till husets stil, väderläge och övriga trädetaljer. Många kunder vill till exempel använda linoljefärg, andra föredrar moderna system med grund- och täckfärg i samma produkt.
Eftersom björkplywood har en slät och tät yta kan den målas med fina resultat, men det är viktigt att grundarbetet görs noggrant. Tänk på att skydda alla synliga snittytor – särskilt ändträ – och följ färgtillverkarens rekommendationer. En målad och regelbundet underhållen räckesdel får lång hållbarhet.
Hur används ribborna och bjälkarna i ett räcke?
Ribbor, spjälor och räckesprofiler från vårt sortiment används som dekorativa delar i räcken till farstukvistar, altaner och verandor. De står inte för själva bärigheten i konstruktionen, utan monteras på en separat stomme – oftast mellan stolpar och längs överliggande träreglar, såsom överliggare och handledare. Du väljer själv hur delarna ska kombineras, vilket ger stor frihet att anpassa uttrycket till olika typer av hus och miljöer.
Överliggare används vanligtvis som de övre och ibland nedre tvärgående delarna i ett räcke, medan ribborna placeras stående mellan dessa. Både överliggare och ribbor finns i olika mönster och utföranden. Eftersom varje byggsituation är unik lämnar vi inga färdiga ritningar eller monteringsförslag – utan fokuserar på att erbjuda komponenter av hög kvalitet som kan ingå i din egen lösning. På så sätt får du ett räcke som passar både funktionellt och estetiskt till just din plats.
Kan jag få räckesribborna i egna mått?
Ja, det går att beställa räckesribbor i specialmått. Förutom våra standardhöjder kan vi anpassa räckesprofilerna efter dina specifika önskemål. Många kunder väljer till exempel att följa befintliga nivåer på huset, eller justera höjden så att räcket harmonierar med fönster och räckeshöjd på andra delar av byggnaden.
Du är välkommen att kontakta oss med mått, antal och eventuella skisser, så tar vi fram ett förslag. Eftersom varje detalj fräses på beställning har vi god flexibilitet, även vid mindre serier.
Vilka höjder finns det på räckesribborna?
De flesta räckesribbor i vårt sortiment finns i flera höjdalternativ, till exempel 600 mm, 700 mm och 800 mm. Exakta mått framgår av respektive produktsida. Behöver du en annan höjd än de som visas i butiken kan vi oftast ordna det – särskilt om du vill matcha befintliga mått på huset eller anpassa räcket efter lokala regler för räckeshöjd.
Eftersom våra delar inte är bärande finns ingen fast norm för höjd – det är upp till dig som kund att utforma och anpassa räcket efter behov och förutsättningar.
Tål era produkter utomhusmiljö?
Ja, både våra material - furu eller björk - tål att användas utomhus förutsatt att den målas och underhålls korrekt. Limtypen (Water and Boil Proof) gör att skivan klarar fukt, regn och temperaturskillnader utan att spricka eller slå sig. Det är dock viktigt att alla ytor täcks ordentligt med färg, inklusive ändträ och urfräsningar.
Vi rekommenderar att du målar så snart som möjligt efter leverans, särskilt om träet ska stå oskyddat under byggtiden. En välmålad och underhållen produkt får god hållbarhet även i utsatta lägen.
Hur lång är leveranstiden för träräcken?
Normal leveranstid för våra räckesdelar är 7–10 arbetsdagar. Det gäller både standardmått och enklare måttanpassningar. Vid större beställningar eller mer avancerad specialfräsning kan leveranstiden bli något längre. Under högsäsong (vår och försommar) är det bra att vara ute i god tid för att vara säker på att hinna få hem delarna i rätt fas av bygget.
Leverans sker som regel med speditör till tomtgräns eller till närmaste utlämningsställe. Du får besked när försändelsen är på väg.
Hur skapar jag ett räcke som passar husets stil?
Börja med att titta på husets fasad, fönsterindelning och övriga snickerier.. Ett enkelt räcke med raka ribbor passar ofta till nyare hus eller byggnader med stram arkitektur, medan profilerade ribbor ger mer uttryck åt äldre hus, verandor eller farstukvistar i traditionell stil.
Du kan också kombinera olika modeller – till exempel använda en enklare ribba men en profilerad bjälke upptill. Våra delar är inspirerade av äldre svensk byggnadstradition och går att kombinera fritt. Har du en bild av huset kan du gärna mejla den till oss så hjälper vi dig att hitta rätt uttryck.
Vad är skillnaden mellan ribbor och spjälor?
Det är ingen faktisk skillnad – orden ribbor, spjälor och räckesprofiler används synonymt i olika delar av Sverige. Båda syftar på de stående delarna i ett räcke.
Hur väljer jag en räckesmodell som passar mitt hus?
Titta på husets byggnadsår, stil och helhetsintryck. Ett sekelskifteshus kan till exempel må bra av ett räcke med snickarglädje – profilerade ribbor med utskurna former. Ett 40-talsradhus kanske kräver enklare former för att smälta in. Ofta handlar det om att hitta rätt balans mellan räckets synlighet och fasadens karaktär.
Vi har samlat modeller med både enkel och mer uttrycksfull design. Om du är osäker kan du alltid kontakta oss för rådgivning. Ett foto på huset hjälper oss att komma med förslag som passar just din miljö.